- Log in to Pruvan Online
- Click on Projects
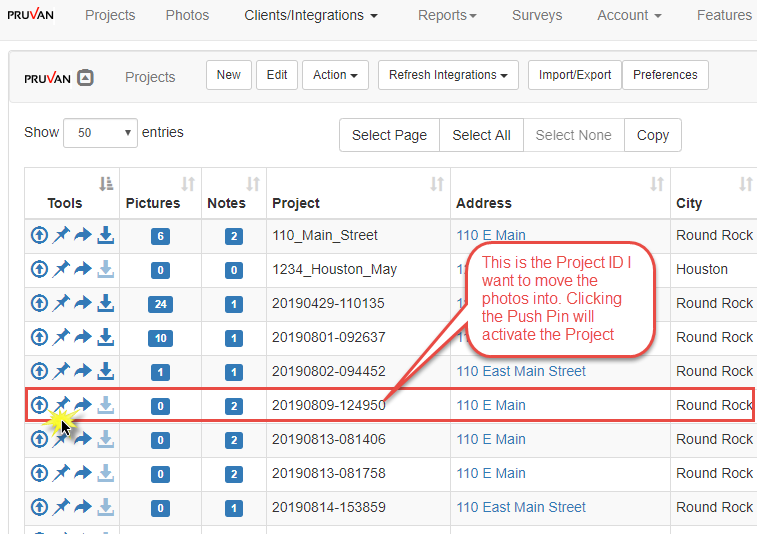
- Find the project that you want to move the photos into
- Click the push pin to activate this project so that you can move photos into it (Remember the Project ID you activated)
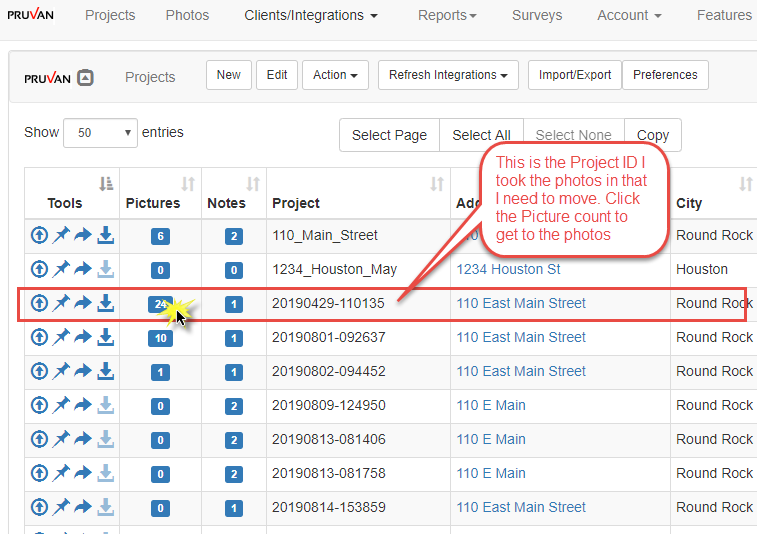
- Now Find the project you took the photos in on the Projects page
- Click the Picture count for that project to launch the Photo Details page
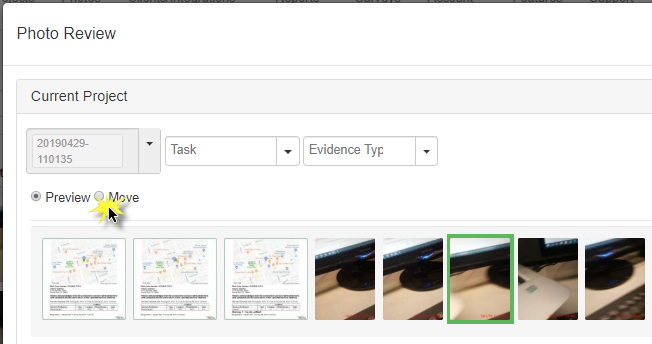
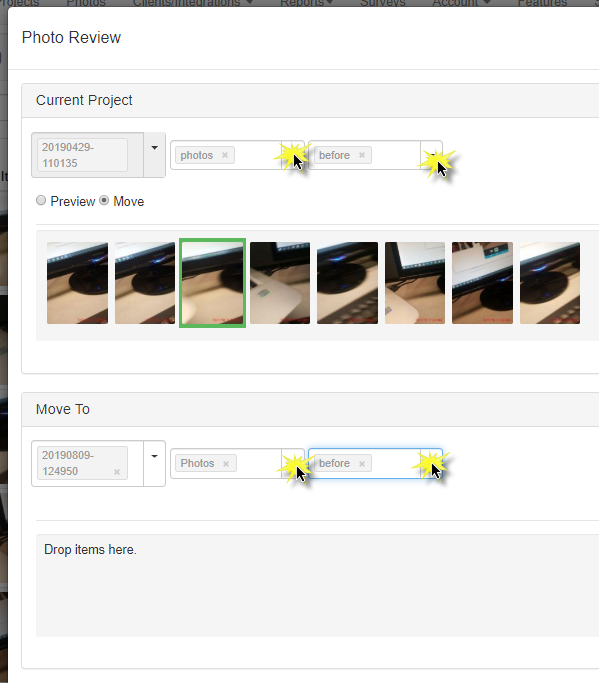
- Click on 1 photo so that the Photo Reviewer box pops up
- Click the option to switch from Preview to Move
- In the Move To section lick the Project drop down and select the project ID you activated on the Projects page
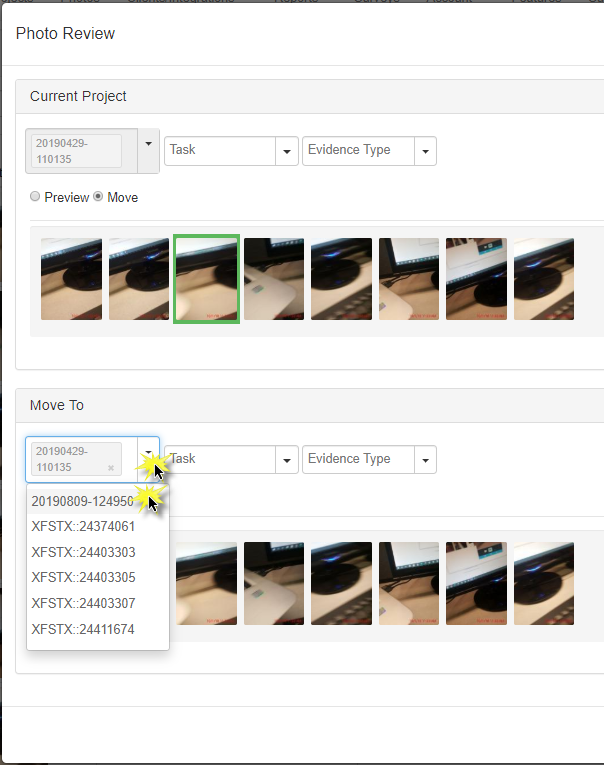
- In both the Current Project Section and Move To section select the Task and Evidence Type (the Tasks and Evidence Types do not have to match in both projects)
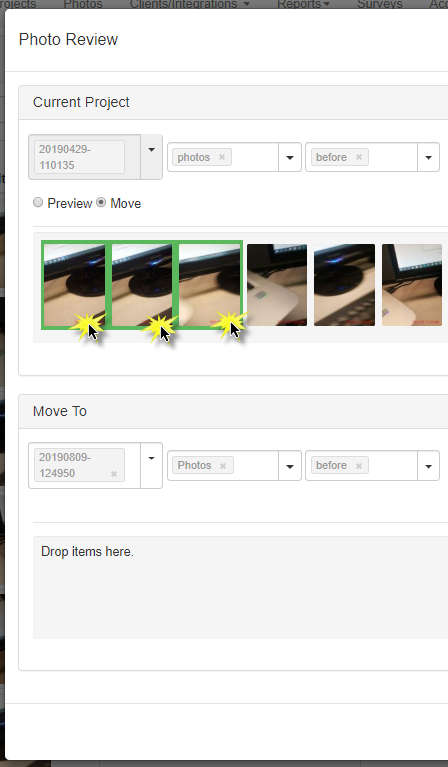
- Click on the first photo, hold down the Shift key on your keyboard and click the last photo you would like to move (A green border will appear around the photos when it is selected)
- Click on one of the selected photos and hold the mouse key down and drag the photos into the Drop items here box in the Move To section
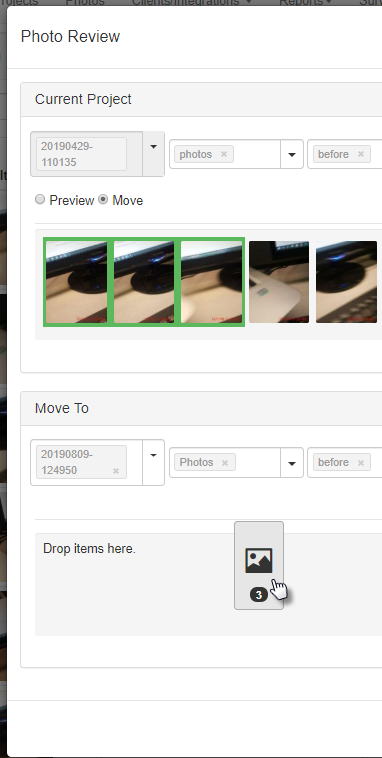
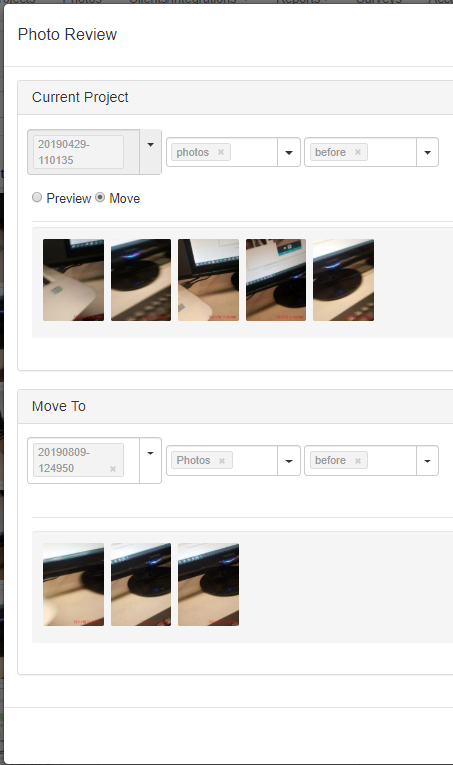
- The photos will move as soon as they are dropped
Publishing
Be sure that you publish your photos as well. Photos "moved" in Pruvan Online will not auto-relay like Pruvan Mobile photos do.
Step 1 is to filter by the Status column to reveal any photos in Pending QA status.
Step 2 is to click on Select All (which will highlight the photos), then in the Publish Selected To drop down, choose the Client option.

This will send all of the results to your integrated client and the Status of the items will go from Pending QA to Published.

Comments