Pruvan Projects can be created on the Projects page and immediately sent down to the phone so that work can be completed as soon as possible.
Create a Project in Pruvan Online
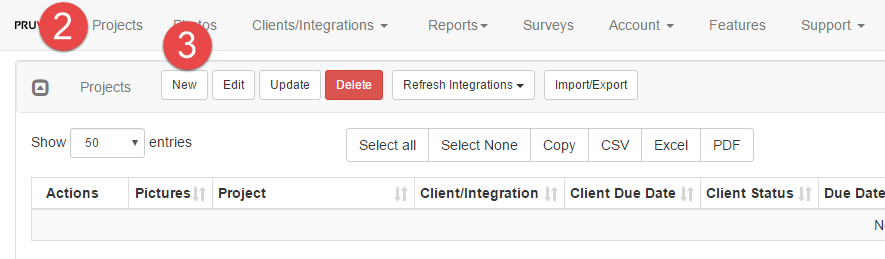
- Log in to Pruvan Online
- Click on Projects
- Click the down arrow next to New
- Select the type of Project to create (This will become your Default selection when creating a New project, but can be changed by clicking the down arrow again)

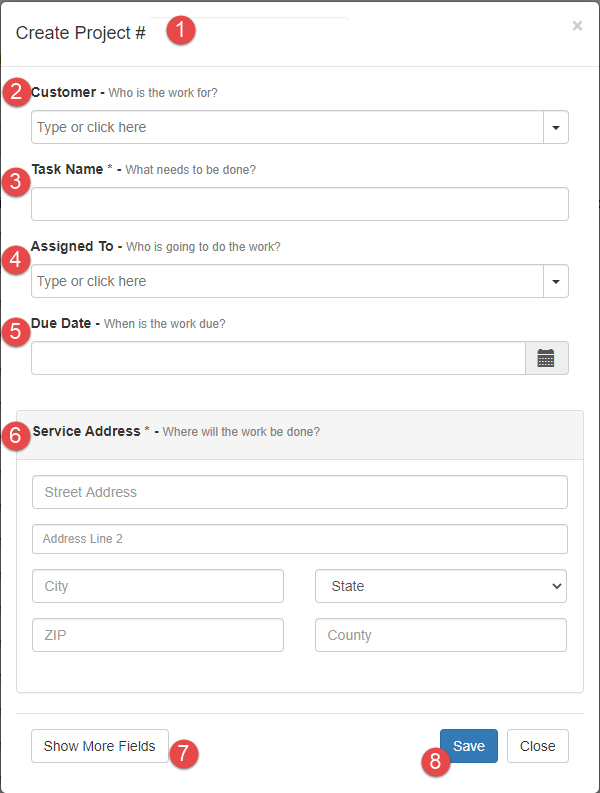
Create a Project for Photos
This will quickly create a project with your default account settings and one Photo task added.
- Choose a unique Project number (This defaults to a project number generated based on the date you create your project)
- (Optional) Enter or Choose a Customer
- Enter a name for the Photo Task on this project
- Choose an assigned user for the project. This defaults to your own username.
- Enter a Due Date for the order or choose from the calendar
- Enter the Service Address for this project
- (Optional) Show More Fields to enter the Advanced creator
- Save your project
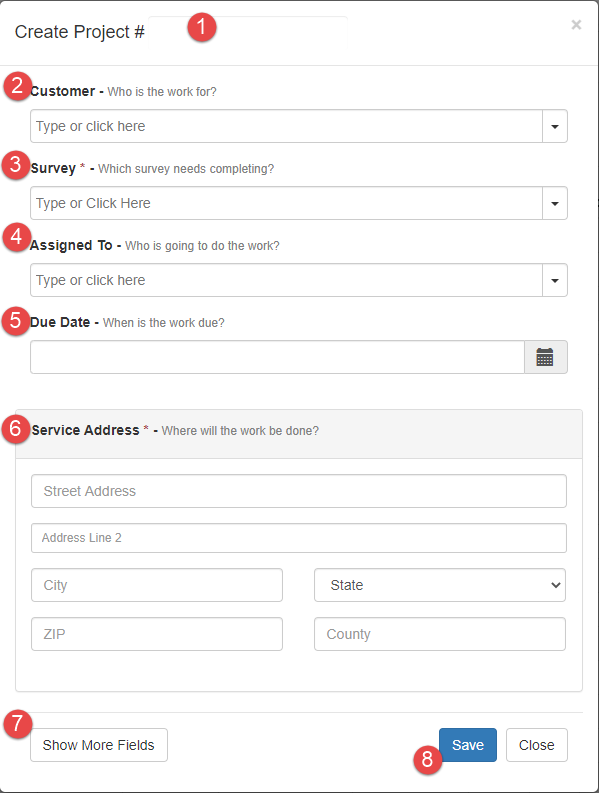
Create a Project for Data Collection
This will quickly create a project with your default account settings and one Survey task added.
- Choose a unique Project number (This defaults to a project number generated based on the date you create your project)
- (Optional) Enter or Choose a Customer
- Select a Survey to attach to this project
- Choose an assigned user for the project. This defaults to your own username.
- Enter a Due Date for the order or choose from the calendar
- Enter the Service Address for this project
- (Optional) Show More Fields to enter the Advanced creator
- Save your project
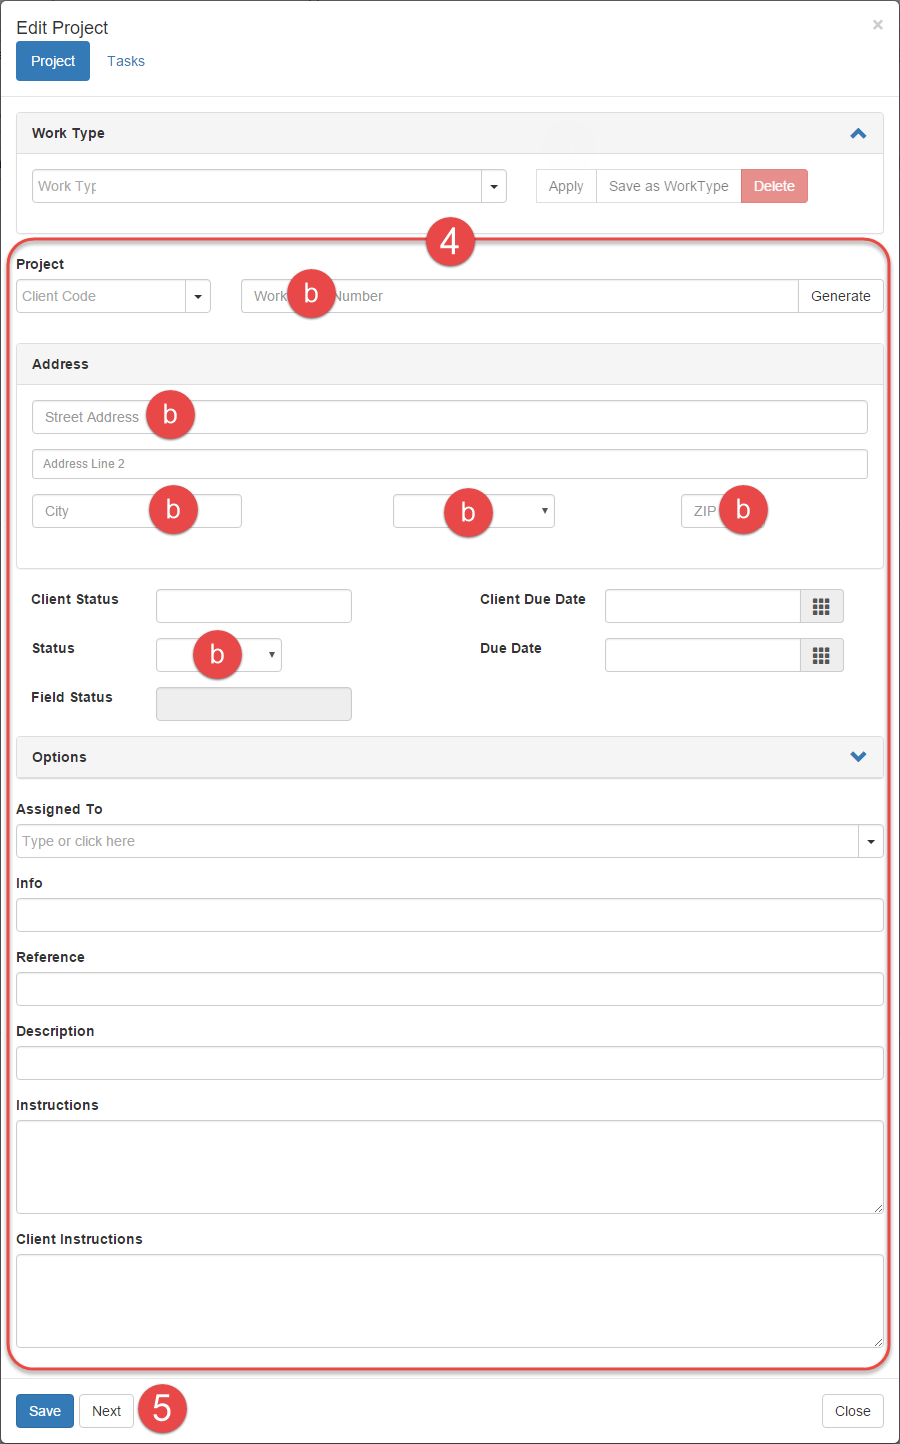
Create an Advanced Project
This will allow you to set up your project to your specifications, using all available Pruvan fields and settings.
- Fill in your Project Information
- When using a Work Type apply it first before editing any fields
- Select the Work Type
- Click Apply
- These Fields are required:
- Project Number
- Street Address
- City
- State
- Zip
- Status
- Assigned To is required when the status is 'assigned'
- When using a Work Type apply it first before editing any fields
- Click Next
- Add a Task to your project
- Fill out the Task Fields
- A Task Name is required for every task
- Previously used Tasks will be saved in a dropdown that will be visible as soon as you click in the Task box
- If you do not see the correct task in that dropdown you can create a new task which will be saved into the dropdown for future use
- Surveys are optional and do not need to be added to the task
- Quantity and Price are optional; these are typically used to note the quantity and price (for each) from your client and are not visible to crew users
- Click Add Task
- Repeat Step 6 as needed
- Add Lines (optional)
- Click Save


Comments