This is the Quick Start Guide for Pruvan Mobile. It is here to get you going with the basic features. For more in-depth articles on how to use Pruvan Mobile please see the Pruvan Mobile area of the Support Center for our full user guide.
Overview
- Get your login
- Download and Install Pruvan Mobile
- Set up your app
- View and Create Projects
- Start taking photos and completing surveys
- Verify Photos and Surveys Upload
- View Photos and Surveys Online
Get your login
You will need a username and password before you can use the Pruvan Mobile app. Already have one? Great! Jump to Downloading the app.
To create your own account see the following article and come on back after you've finished there.
If you were instructed by your client to use Pruvan and they did not tell you to create an account then they should have provided you with a username and password. If not, please call and verify.
Download and Install Pruvan Direct mobile app
Android
![]()
Alternatively you can follow these steps:
- Open the Play Store on your device
- Search for Pruvan Direct
- Look for the red checkmark and tap
- Tap install
iOS
![]()
Alternatively you can follow these steps:
- Open the App Store on your device
- Search for Pruvan
- When using an iPad make sure to switch from 'iPad apps' to 'iPhone apps'
- Look for the red checkmark and tap
- Tap the cloud install icon
Set up your app
- Open the app
- Enter a Device Nickname
- This should be something that identifies you and your device
- ie Bob S10 for Bob's Samsung Galaxy S10
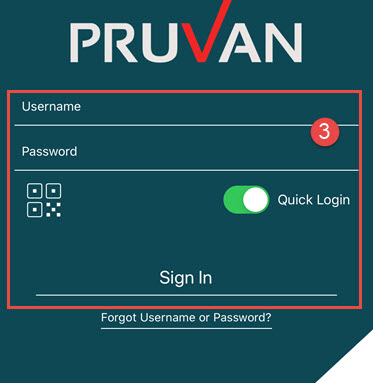
- Login with your Username and Password and Sign In
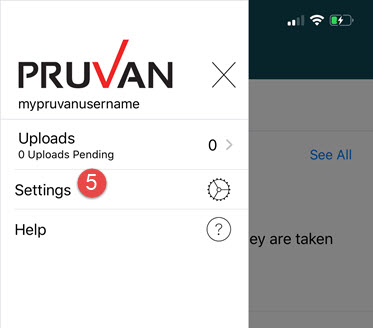
- Tap the Menu button
- Tap Settings
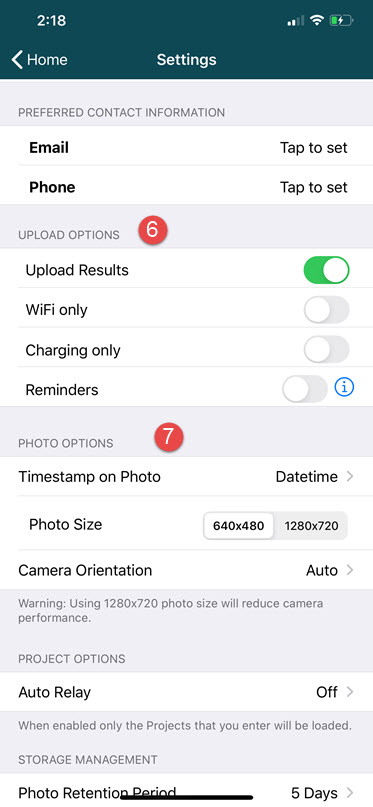
- Select "WiFi only" or "Charging only" if you want if you only want photos to upload to Pruvan only when connected to a Wi-Fi network or a Charger.
- Set your Photo Options - timestamp, resolution, and orientation
- Enter your preferred email address for Pruvan Support tickets
- Press the back button to return to the Home Screen
Home Screen and Projects
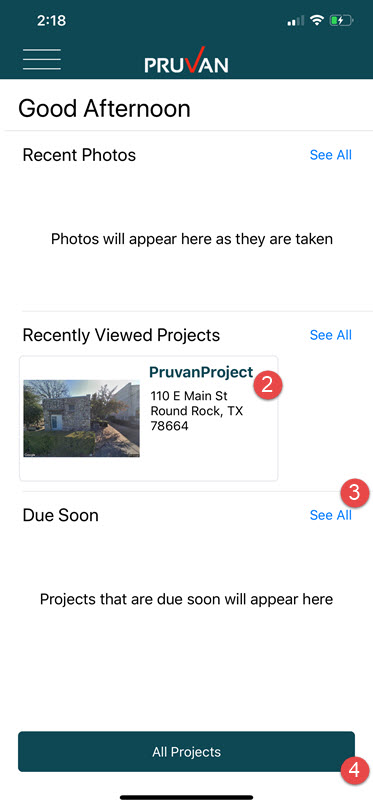
- On the Home Screen you can view a list of Recent Photos, Recently Viewed Projects, or Projects Due Soon
- Select a project to go directly to the project details
- Select See All next to a category to view your projects sorted by recently viewed or due soon
- Tap ALL PROJECTS to view all projects assigned to your user name
- All / To Do - Shows and Hides completed projects
- Also shown as Show / Hide Completed in the Android menu
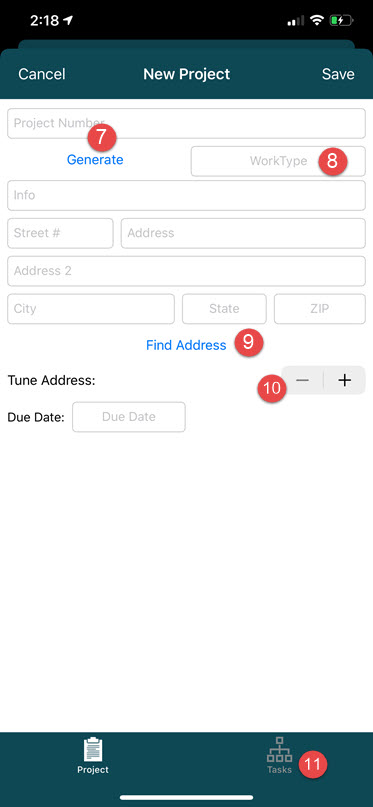
- Tap the + button to create a new project
- Enter a project number or tap generate to create one
- Select a Work Type for your order (if applicable)
- Tap find address
- Use the Tune buttons to adjust the street number
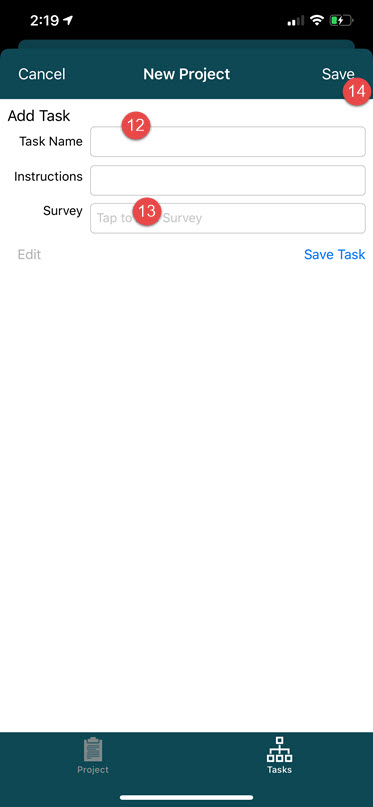
- Swipe over to the Tasks screen
- Enter a photo task name and tap add
- Enter a survey task name, select the sample survey from the dropdown, and tap add
- Save your project
Start taking photos and completing surveys
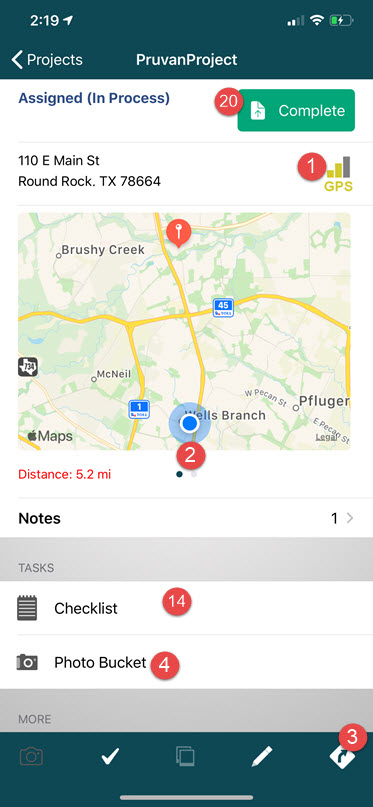
- Make sure you're at the right location
- Swipe to view a Street View and Property Photo (if available)
- Get turn-by-turn directions from your navigation app
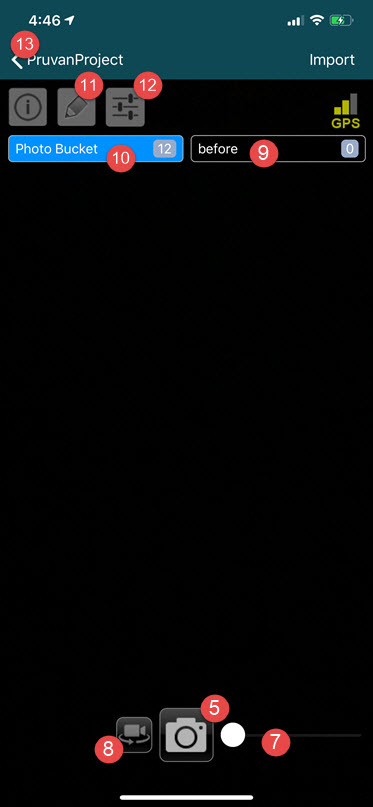
- Tap the photo task to open the camera
- Snap some photos
- Review photos as they're taken
- Zoom in / out
- Tap the Video mode toggle to shoot a 15 second video
- Change your evidence type
- Switch tasks
- Add a note to your photo
- Adjust your settings
- Press the back button
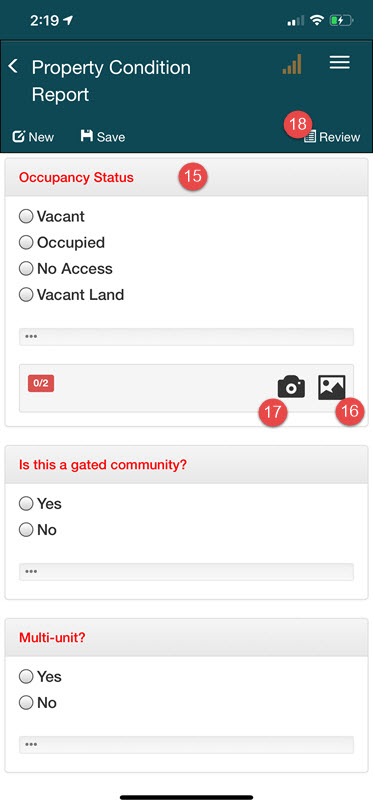
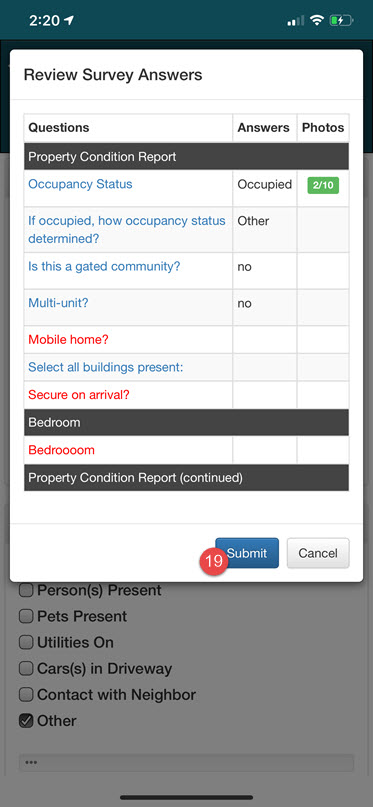
- Tap the survey task
- Answer all required questions
- Tap the Gallery icon to choose existing photos
- Open the camera to take new photos
- Review your answers
- Submit your survey
- Complete your project
Verify Photos and Surveys Upload
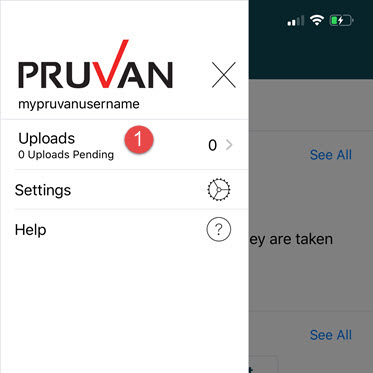
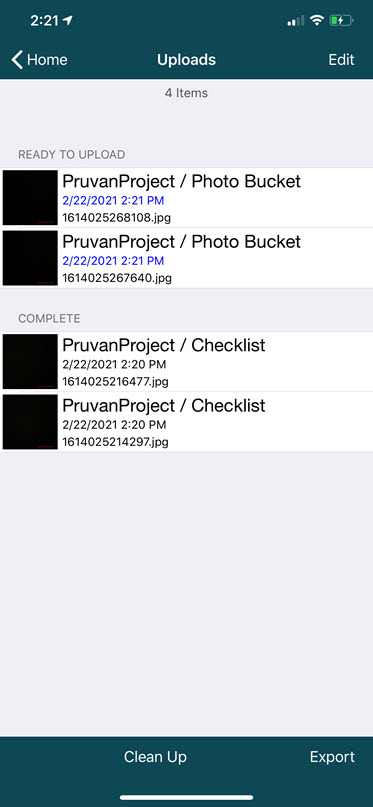
- Return to the Home Page and open the menu, then choose Uploads
- View upload status of all photos and surveys
- Retry failed uploads
- Free up space
- deletes only photos that have uploaded successfully
Upload Statuses
- Upload Complete - Your photo is safe and secure in Pruvan's Cloud Storage
- Upload Pending - Your photo has not yet uploaded
- Pending Photo Completion - The survey will upload once all of the survey's photos have uploaded
- Pending Project Completion - The photos and surveys will upload once the Complete button has been pushed
- Upload Failed - Your photo attempted to upload, but did not succeed
- Failed, file not found - Your device storage is not accessible or the photo has been manually deleted
- Failed, photo damaged - The photo has been altered. Altered Photos will not upload to Pruvan Cloud Storage.
View Photos and Surveys Online
You can view your Photos in Pruvan's Cloud Storage by logging in to Pruvan Online and looking up your project in the Photos page.
Get Help
Know Who to Contact
- Project Trouble? Contact your work provider
- For technical problems with the app contact Pruvan Support M-F, 9am - 5pm (closed on US holidays)
- Fall back to Plan B if needed
Tap the ? on the login screen to access support
- Make sure the Pruvan Server Status is Online. If not check your internet connection.
- Tap Help to access the Pruvan Support Center from your device.
- Tap Request Support, describe your problem, and submit to open a ticket with the Pruvan Support team.
Comments